Build on Websim with your ChatGPT account

There's a new way to build on Websim: chat with a coding agent that builds your project live. It runs on your own ChatGPT account, and Websim doesn't charge anything for it.
You don't need a paid plan. A free ChatGPT account works. And if you don't have a ChatGPT account at all, you can create one for free along the way (step 4 shows you where). Once it's connected, you can prompt the agent right here on Websim using ChatGPT's free tier. Paid plans (Plus or Pro) just give you a lot more messages.
The first-time setup takes a few minutes. Follow the pictures and you can't get lost.
What you'll need
- A Websim account
- A ChatGPT account (free is fine, and you can create one during setup)
- Your phone, in case ChatGPT texts you a verification code
Step 1: Open the Build tab
Open your project and click the hammer icon in the sidebar on the right. Then click Connect ChatGPT.
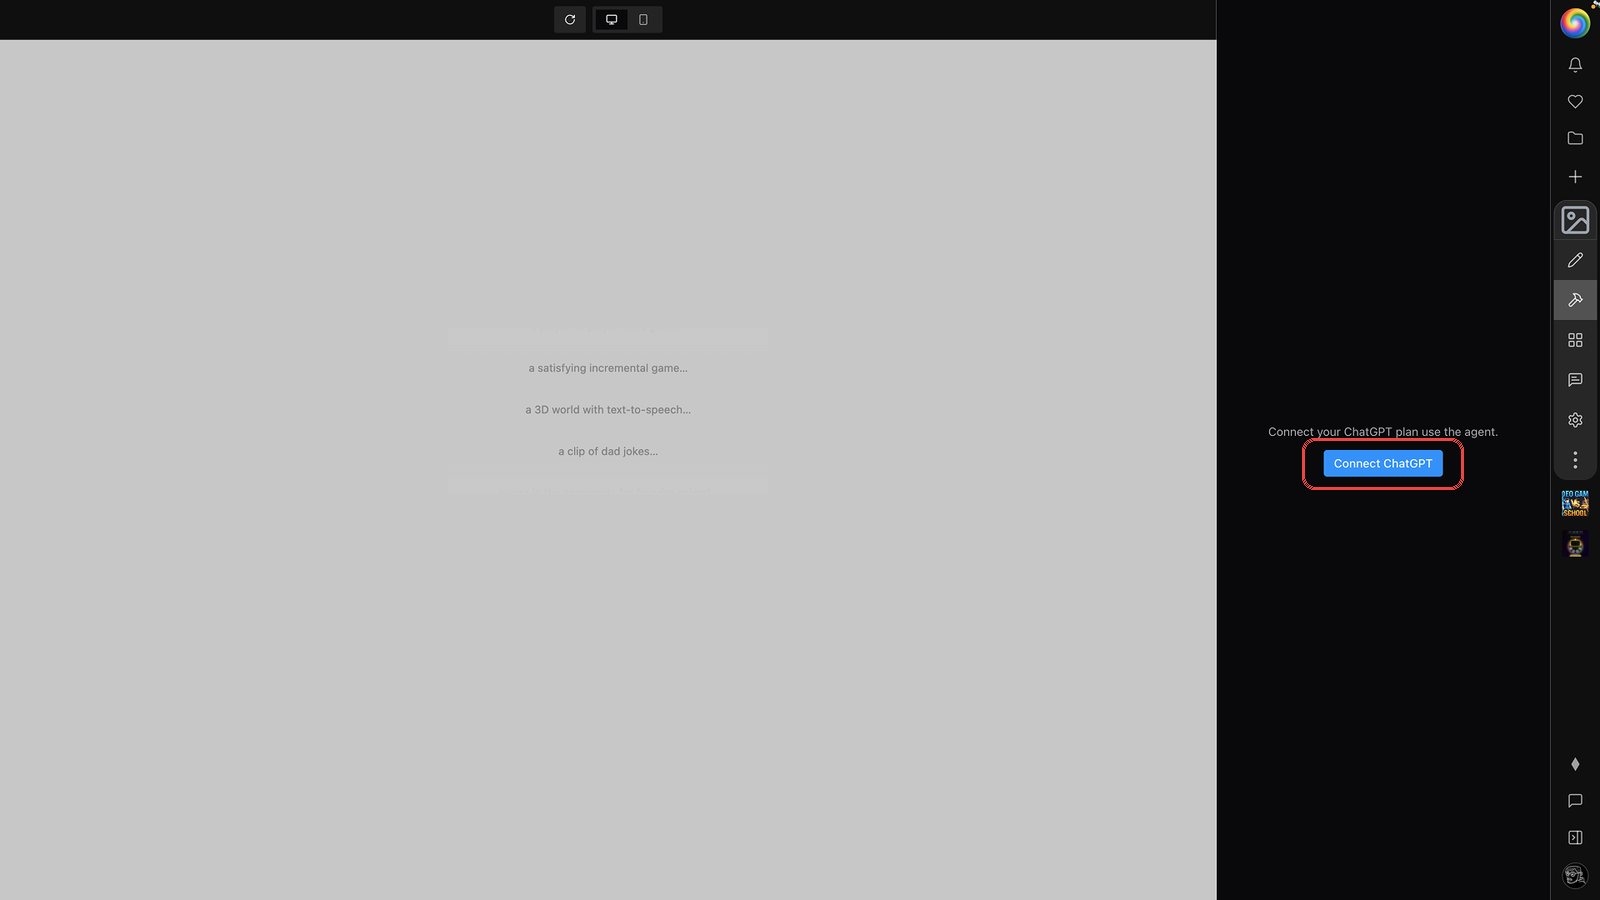
Step 2: Click Sign in with ChatGPT
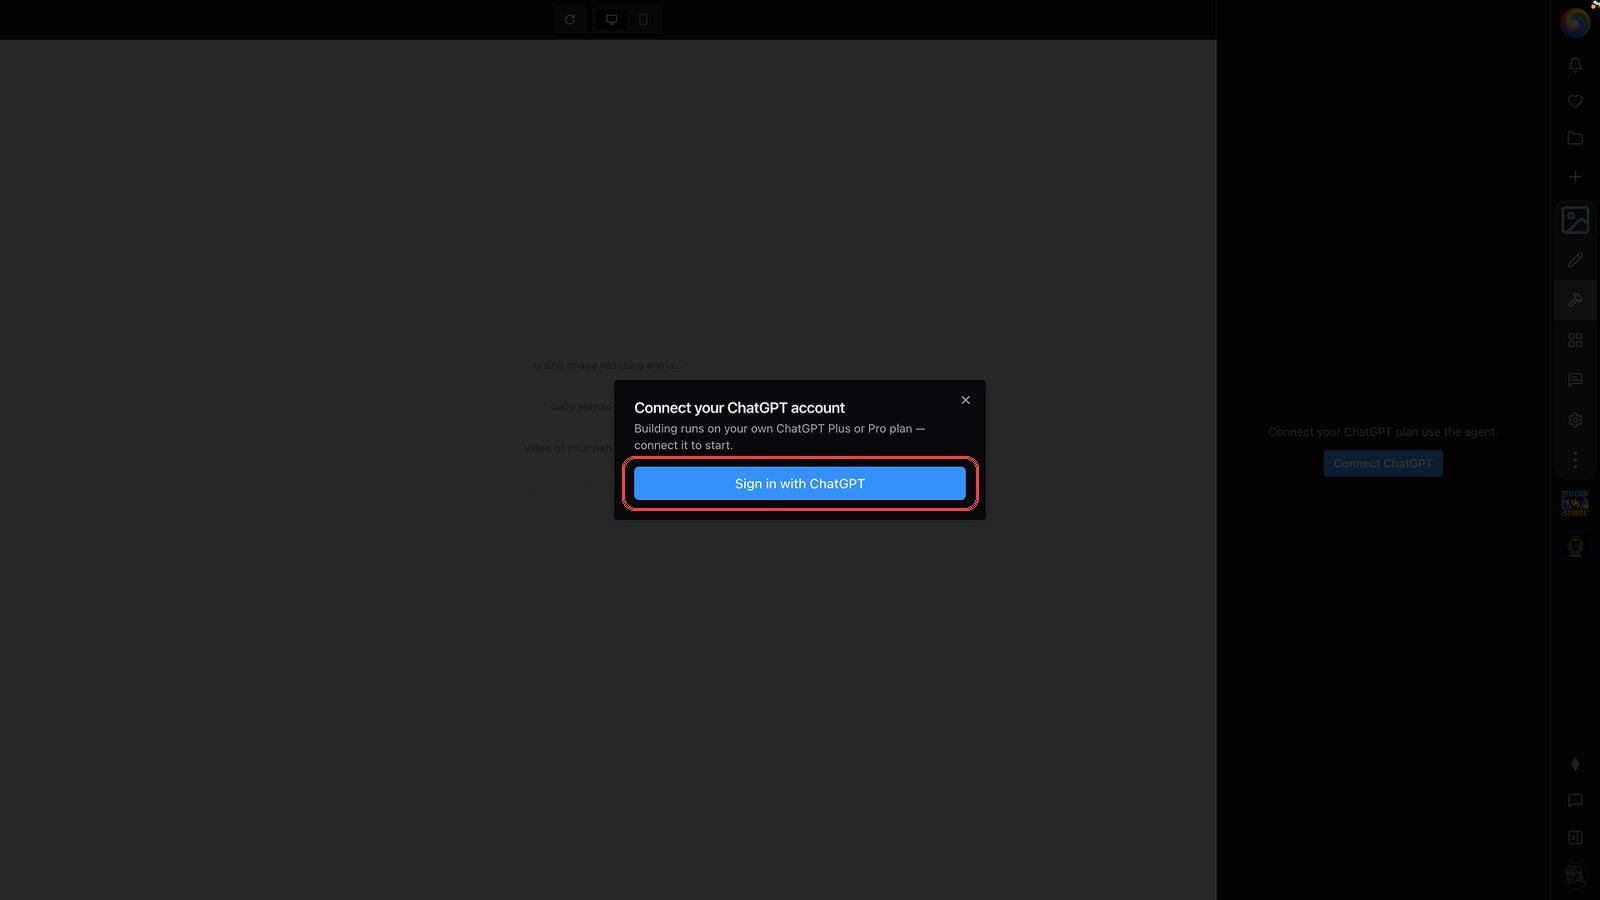
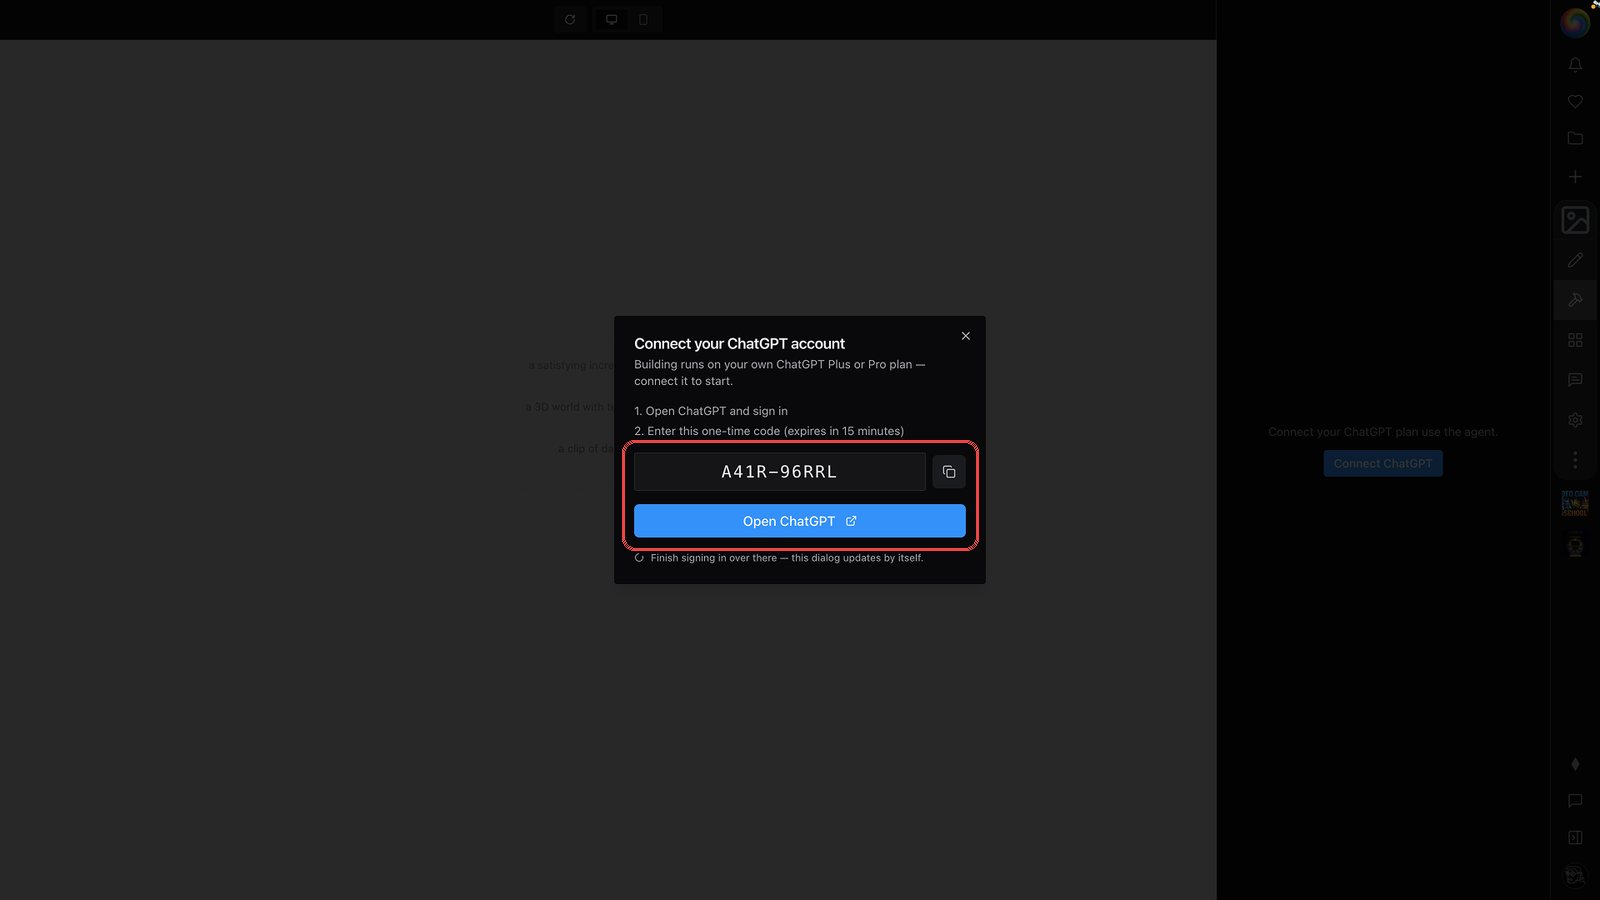
Step 3: Copy your code, then click Open ChatGPT
Websim shows you a short code. Copy it. You'll type it into ChatGPT soon.
The code lasts 15 minutes. If it runs out, close the dialog and reopen it for a new one.
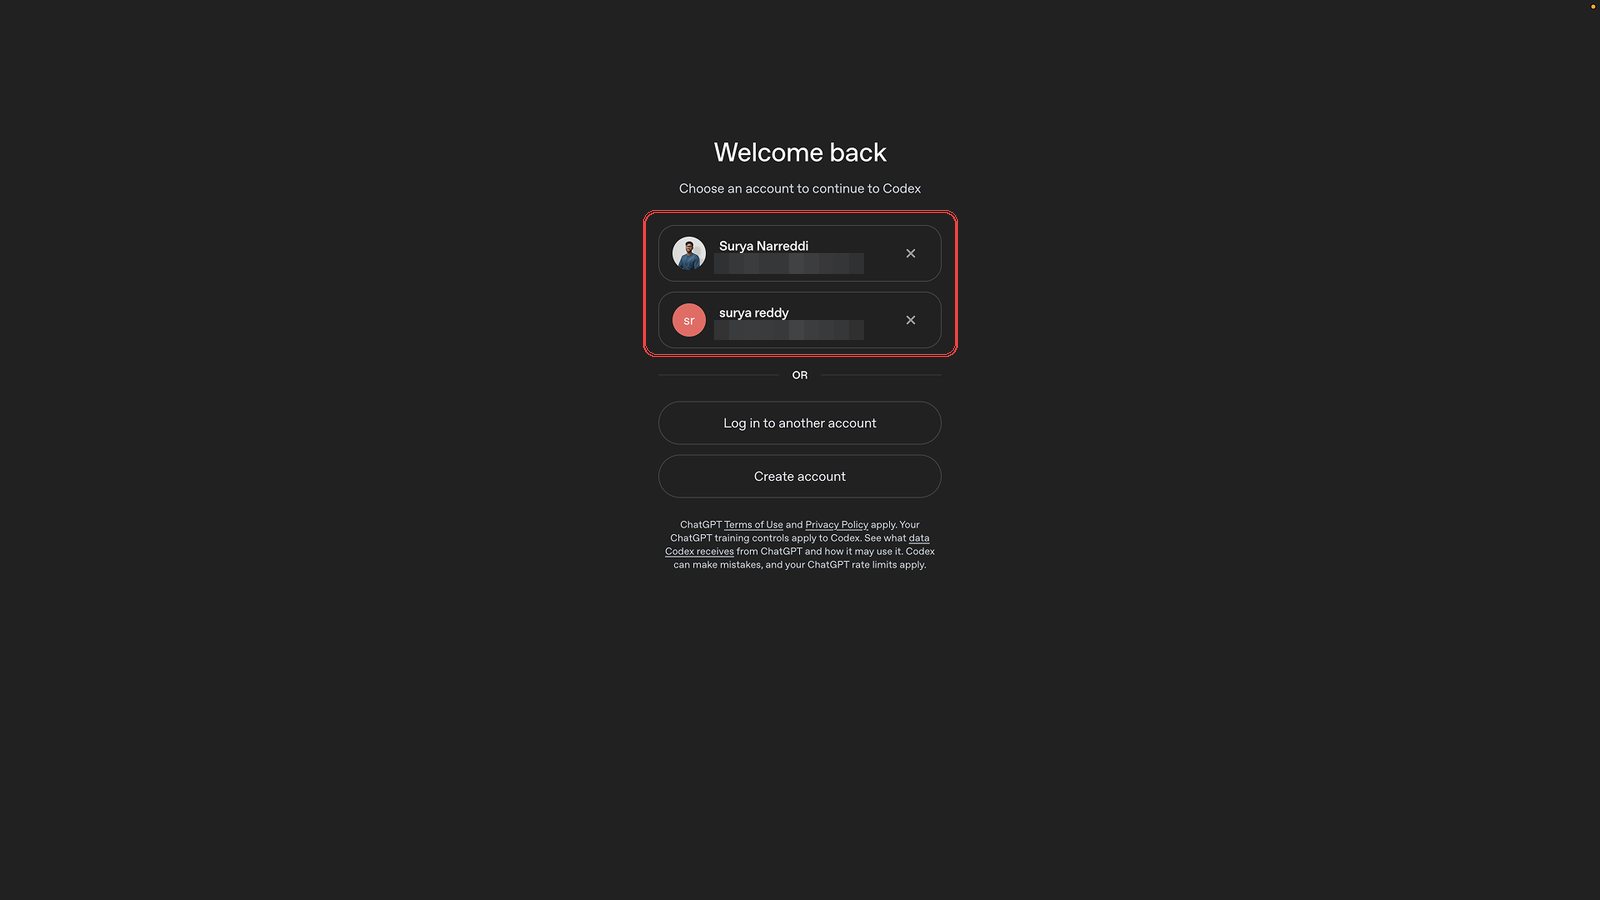
Step 4: Pick your ChatGPT account
A ChatGPT tab opens. Pick your account.
No account? Click Create account and make one. It's free, and it works for this.
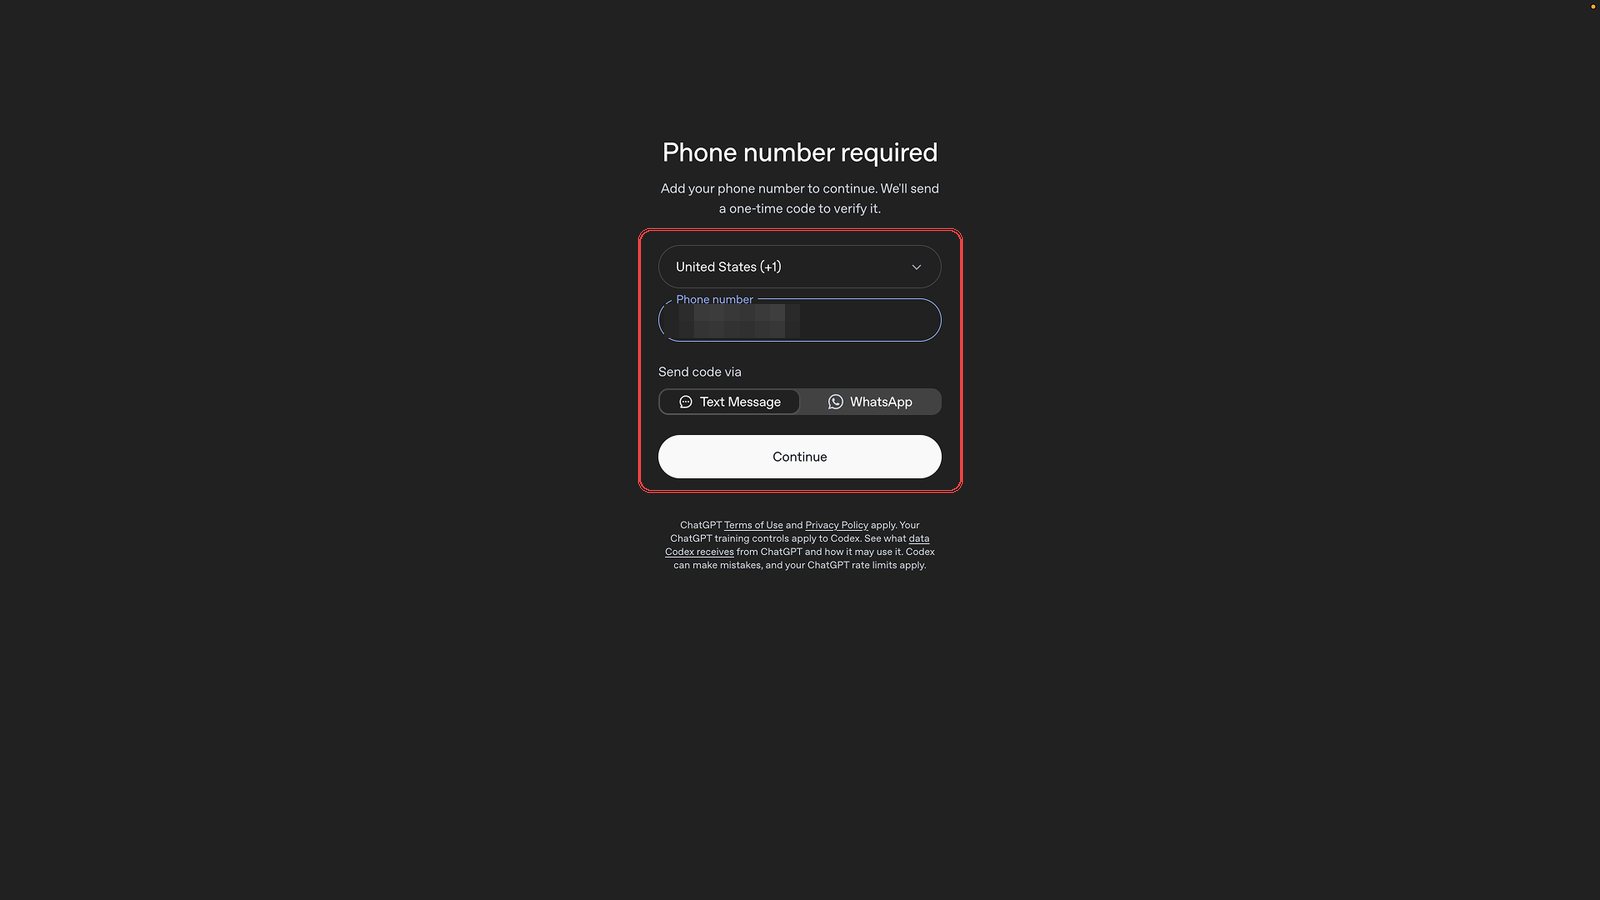
Step 5: Verify your phone (if asked)
ChatGPT may ask for your phone number. Enter it, choose Text Message or WhatsApp, and type in the code it sends you.
Don't see this screen? Skip ahead.
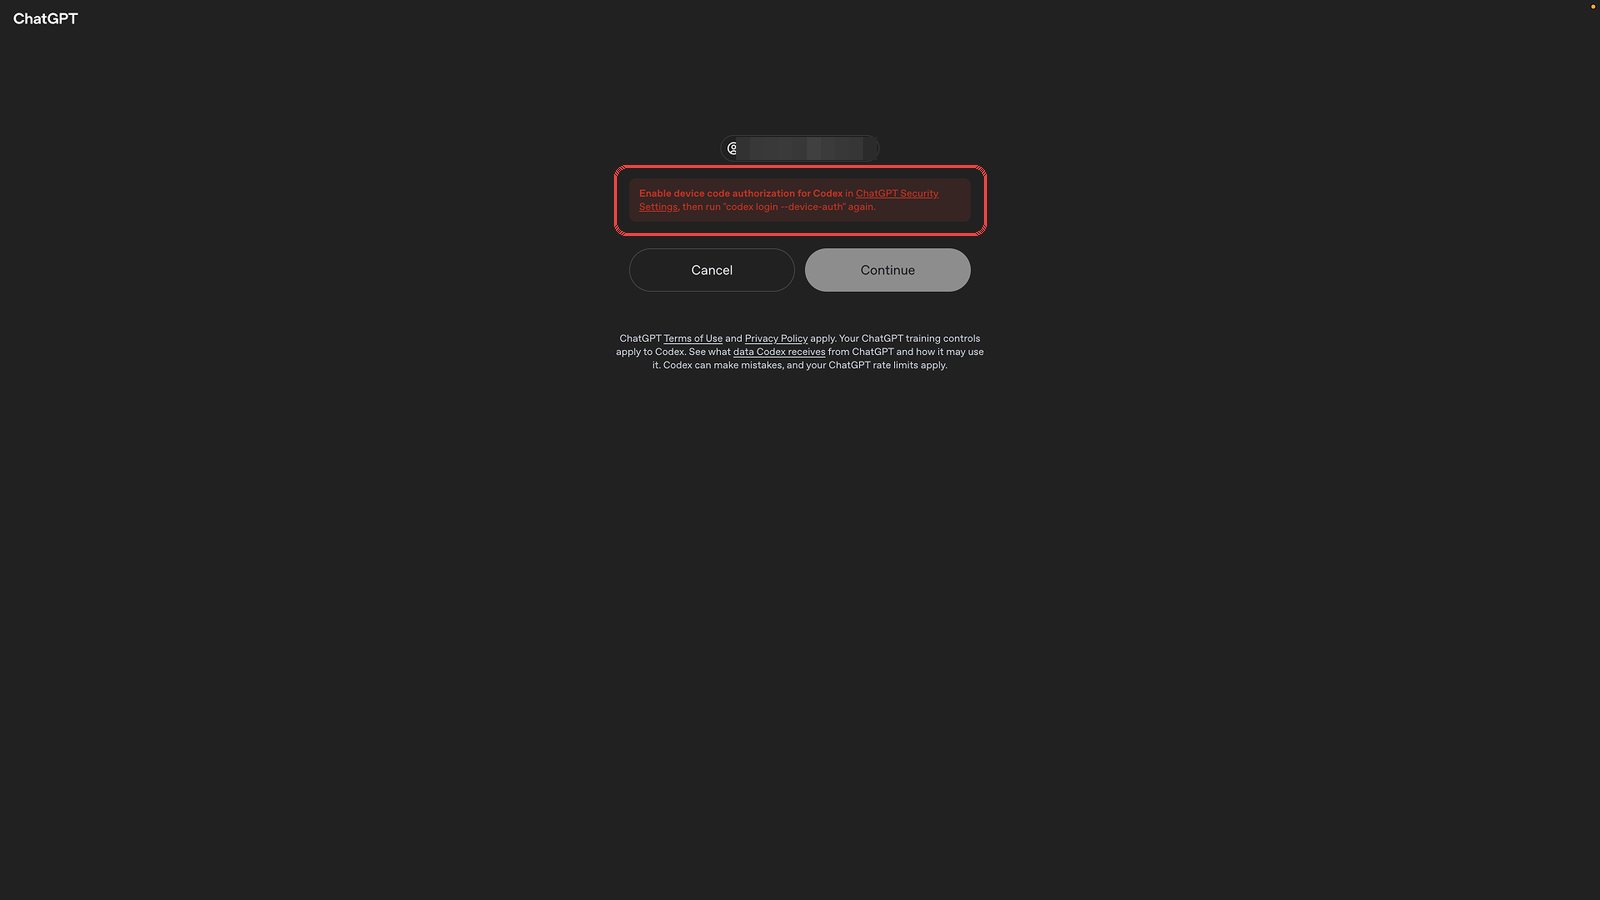
Step 6: See a red message? Flip one switch
You may see this in red: "Enable device code authorization for Codex." Nothing is broken. There's just a switch ChatGPT keeps off until you turn it on. You only do this once:
- Click the ChatGPT Security Settings link inside the red message.
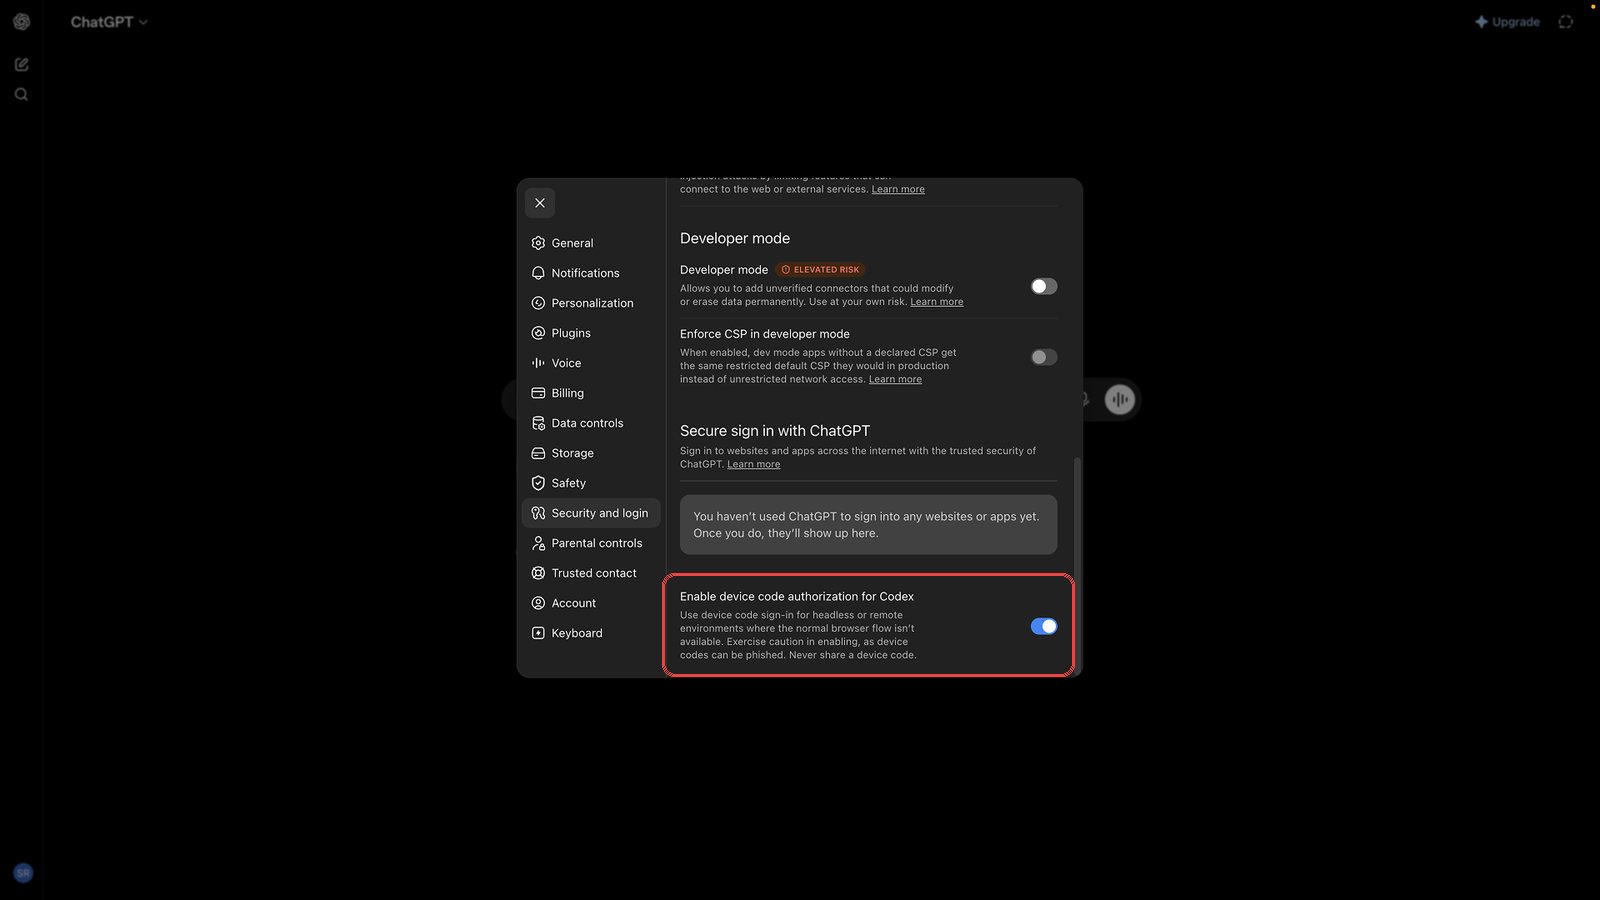
- It opens ChatGPT's Security and login settings. Scroll to the bottom.
- Turn on Enable device code authorization for Codex.
(The red message also mentions running "codex login". Ignore that part. It's for terminal users, not you.)
Step 7: Now redo the sign-in, without the red message this time
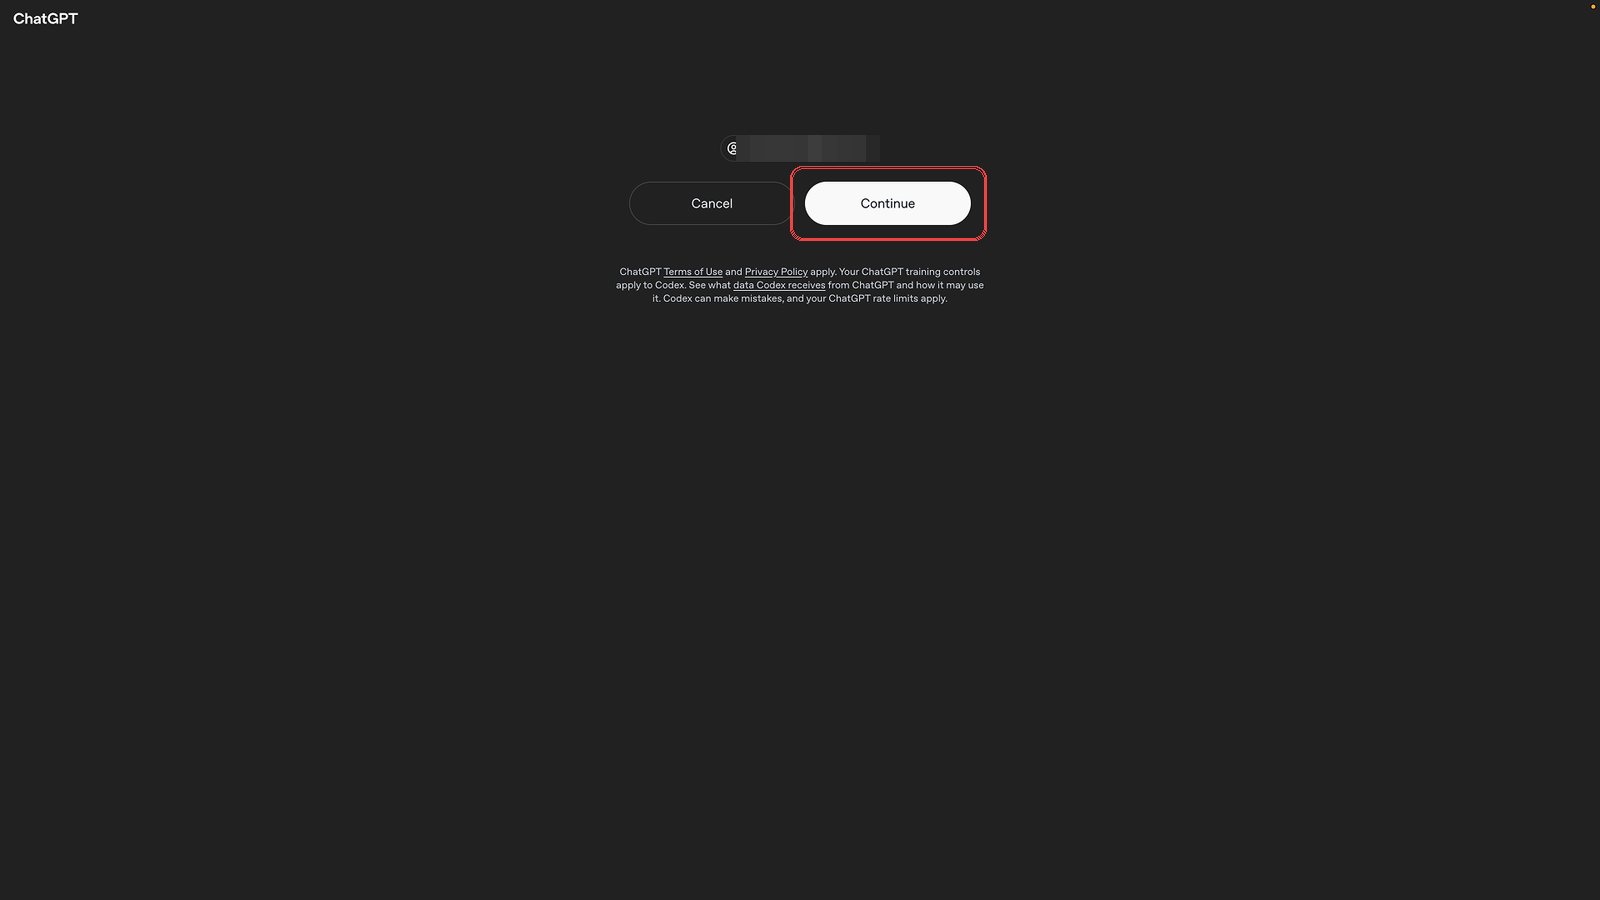
The switch only counts for a fresh sign-in. So after turning it on:
- Go back to your Websim tab. The connect dialog should still be open.
- Click Open ChatGPT again. (Code expired? Close the dialog, reopen it, and copy the new code first.)
- Go through the same screens as before: pick your account, and click Continue. The red message is gone now.
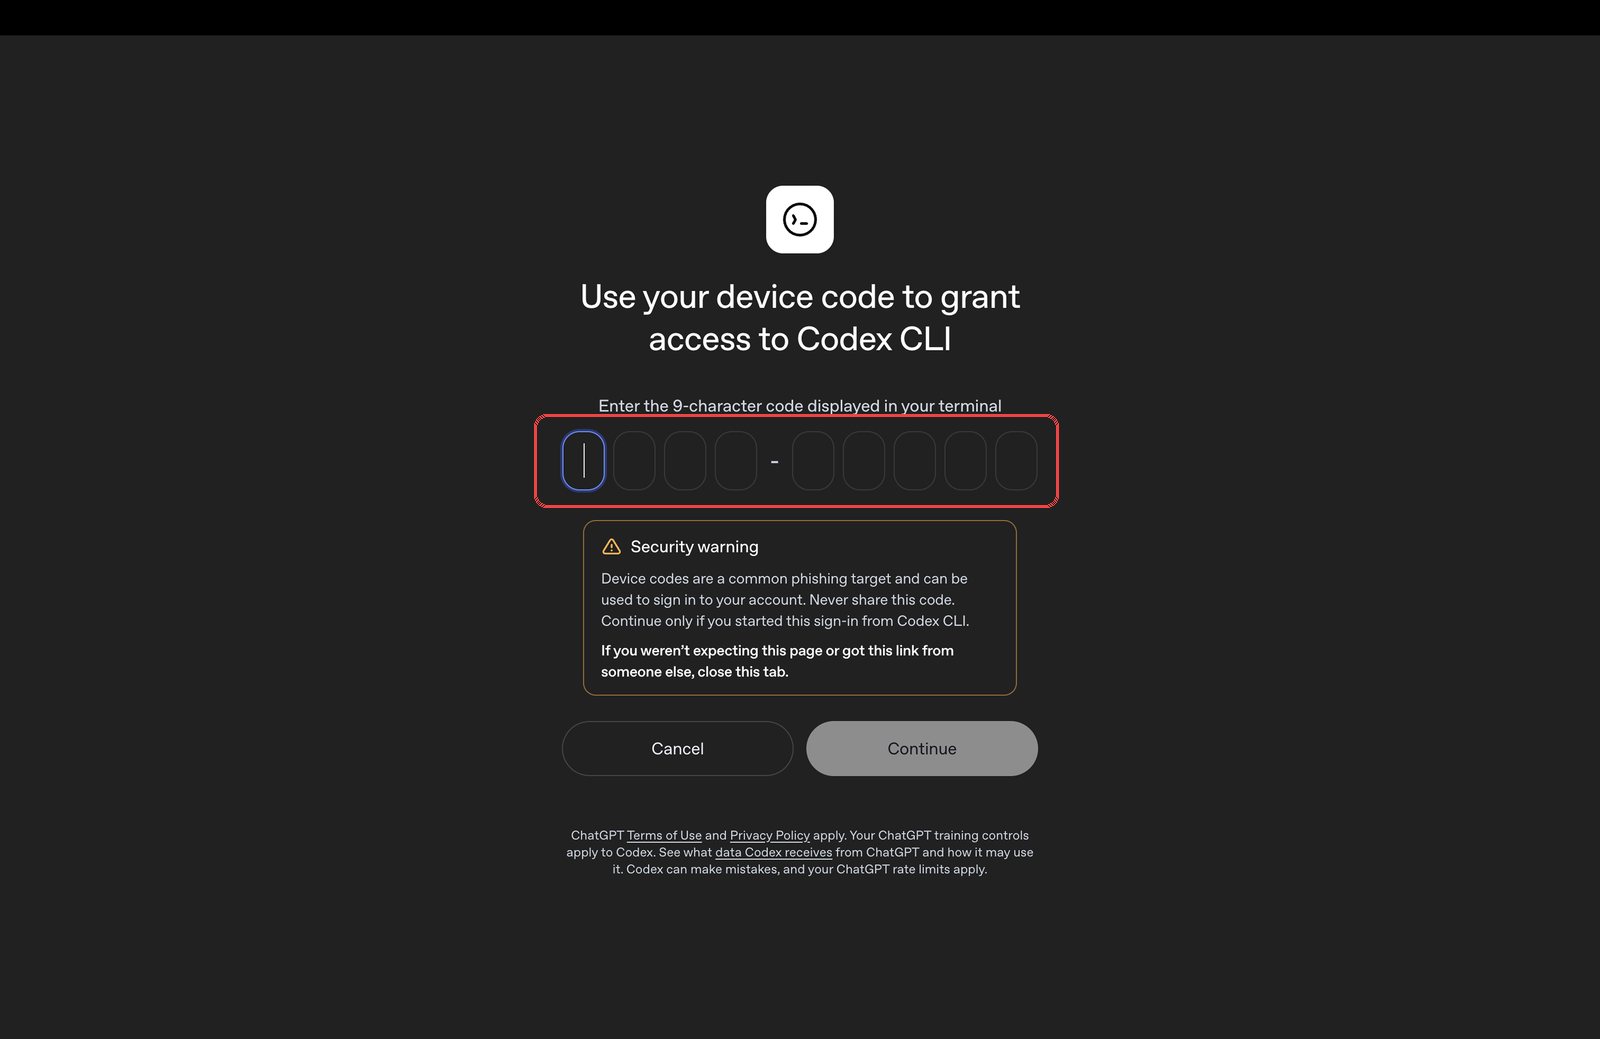
Step 8: Type in your code
ChatGPT asks for the code you copied from Websim. Type it in.
You'll see a security warning on this page. That's normal, and it's good advice: only enter a code when you started the sign-in, like right now. Never enter a code someone else sent you.
Step 9: Done. Start building
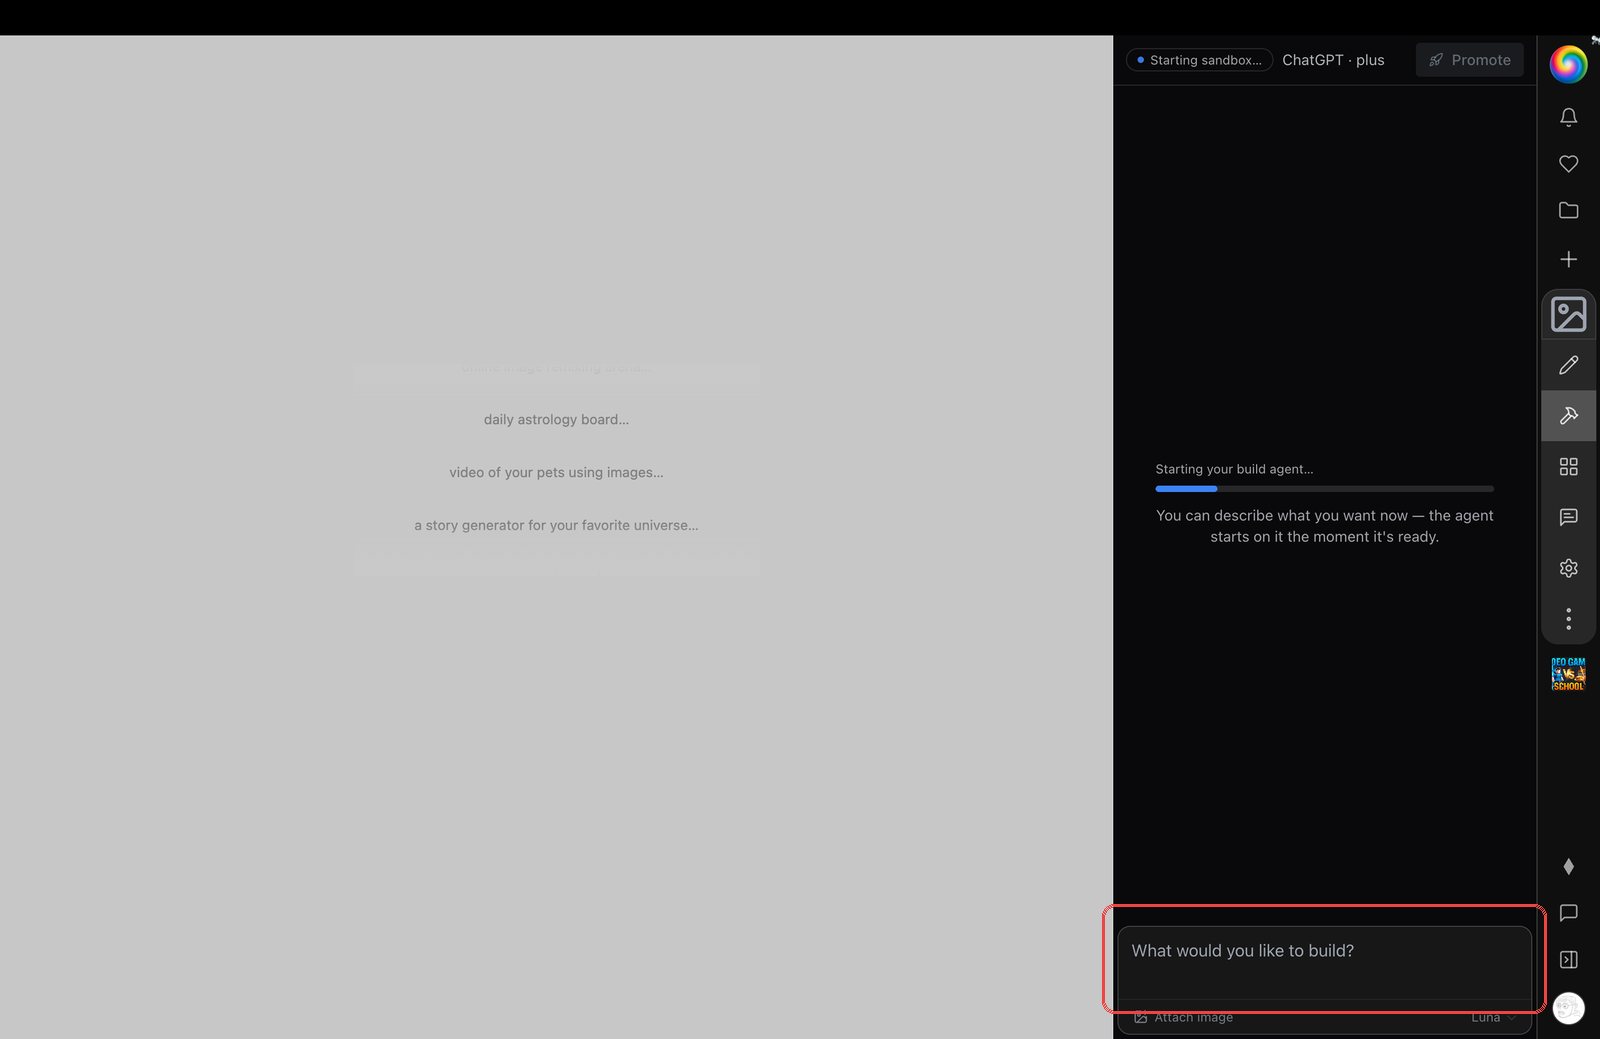
Go back to your Websim tab. The dialog closes by itself and your build agent starts up, with a ChatGPT badge showing you're connected.
Type what you want to build into the box at the bottom. The agent gets to work. You can attach images too.
Good to know
- It doesn't use your Websim credits. Building this way runs entirely on your ChatGPT account. It's completely separate, so your Websim credits stay untouched.
- Your ChatGPT plan sets your limits. Free accounts get a small number of messages. Plus and Pro get a lot more. Websim charges nothing either way.
- The setup is one-time. Next time, the Build tab goes straight to the agent. The switch stays on too.
- The agent edits your project live. You'll see changes appear as it works, and you can keep chatting to steer it.
The short version: make a free ChatGPT account, connect it once, and you've got a free way to build on Websim that doesn't spend a single credit. Not bad for a few minutes of setup.
This is an early experiment and we're actively shaping it. If you try it, tell us what you built and what felt rough.